

Do you have a plain wall and don’t know what to do with it? Want to add a fun D.I.Y. (Do-it-Yourself) project to your house? Wanna add a backslash in your kitchen, but don’t want to spend tons of money on it? Try this!!
We use to have a bare looking wall between our cupboards and the sink and had no idea what to do with it. So, we decided to spruce it up and make a backsplash. But what can you make a backsplash out of, that looks nice and isn’t too heavy?
CORKS of course!!
This was such a fun and unique DIY project. And since I have a super awesome roommate who serves at an upscale restaurant, (shout out to Carlye!) we got all of our corks for free, making this project, in total, cost less than $15!
(And then we added a wine holder from Ikea for $12.99)
Grand Total for a brand new D.I.Y Wine Cork Backsplash?!
$25!!
Wanna make one yourself, here’s how to do it…

What you’ll need:
- CORKS
- A piece of PLYWOOD
- WOOD GLUE
- Something to cut your corks…we used THIS.
- Wine Holder (*optional- we bought this one)
- Cutting Glove (*optional…but be careful…or get one HERE)
First things first…

Number One
START COLLECTING CORKS!!
There are a few ways you can do this:
-Drink LOTS of wine yourself,
-Ask friends who work in restaurants,
-Friends who drink lots of wine,
-Friends who have friends who drink lots of wine,
-or even ask the bar tender or server at restaurants you’re at if they have any lying around in the back that they wouldn’t mind grabbing for you.
OR…If you would rather just buy corks, they are available online. A quick Amazon search and you can find deals like the one below.
Check out Amazon’s deals HERE!
Whatever you do, start collecting your corks now!
NUMBer two
Measure out the space you are going to want to put your backsplash, (or if you want to make a cork board, coasters, whatever you decide…measure the space you want for your project.)
number three
Head to your local hardware store and grab a piece of wood. We chose the thinnest piece we could find, because we didn’t want it to weigh a lot and we knew we would only be using nails to hang it…no screws for us…
#Renterslife!
Amazon has this piece too… HERE!

Number four
Cut your corks. We cut ours lengthwise, so we could see the brands on the cork, but you can cut it in half the other way to see the ends of the corks instead, if you prefer. Just be mindful, the ends can be different sizes due to swelling, if you are using used corks.
Now this was the trickiest part for us…HOW to cut the corks. We tried scissors, steak knives, boxcutters (razors) and ended up using the sharp razors in the end. Like this one
HERE
.
Another bonus of having a roommate who works in a restaurant, she brought home a
cutting glove (like this one)
to use so I wouldn’t cut myself in the process. Saved my hand, I’m sure! So be EXTRA careful with this step.
We got a cutting board and started slicing the corks in half. *Be super careful when cutting these.* It’s a small space to be cutting, and they can slip out of your hands if you’re not holding them tight As long as you are being careful and paying attention to what you are doing, you can do it with no problem.
(BTW…the scissors and steak knife gave me a corse cut, but the razor blade gave me a nice smooth cut, so keep that in mind as you’re cutting.)
When you are finished cutting all your corks (or while you are still in the process and you’re like me and want to do it as soon as possible), lay them out and start figuring out how you want it to look.
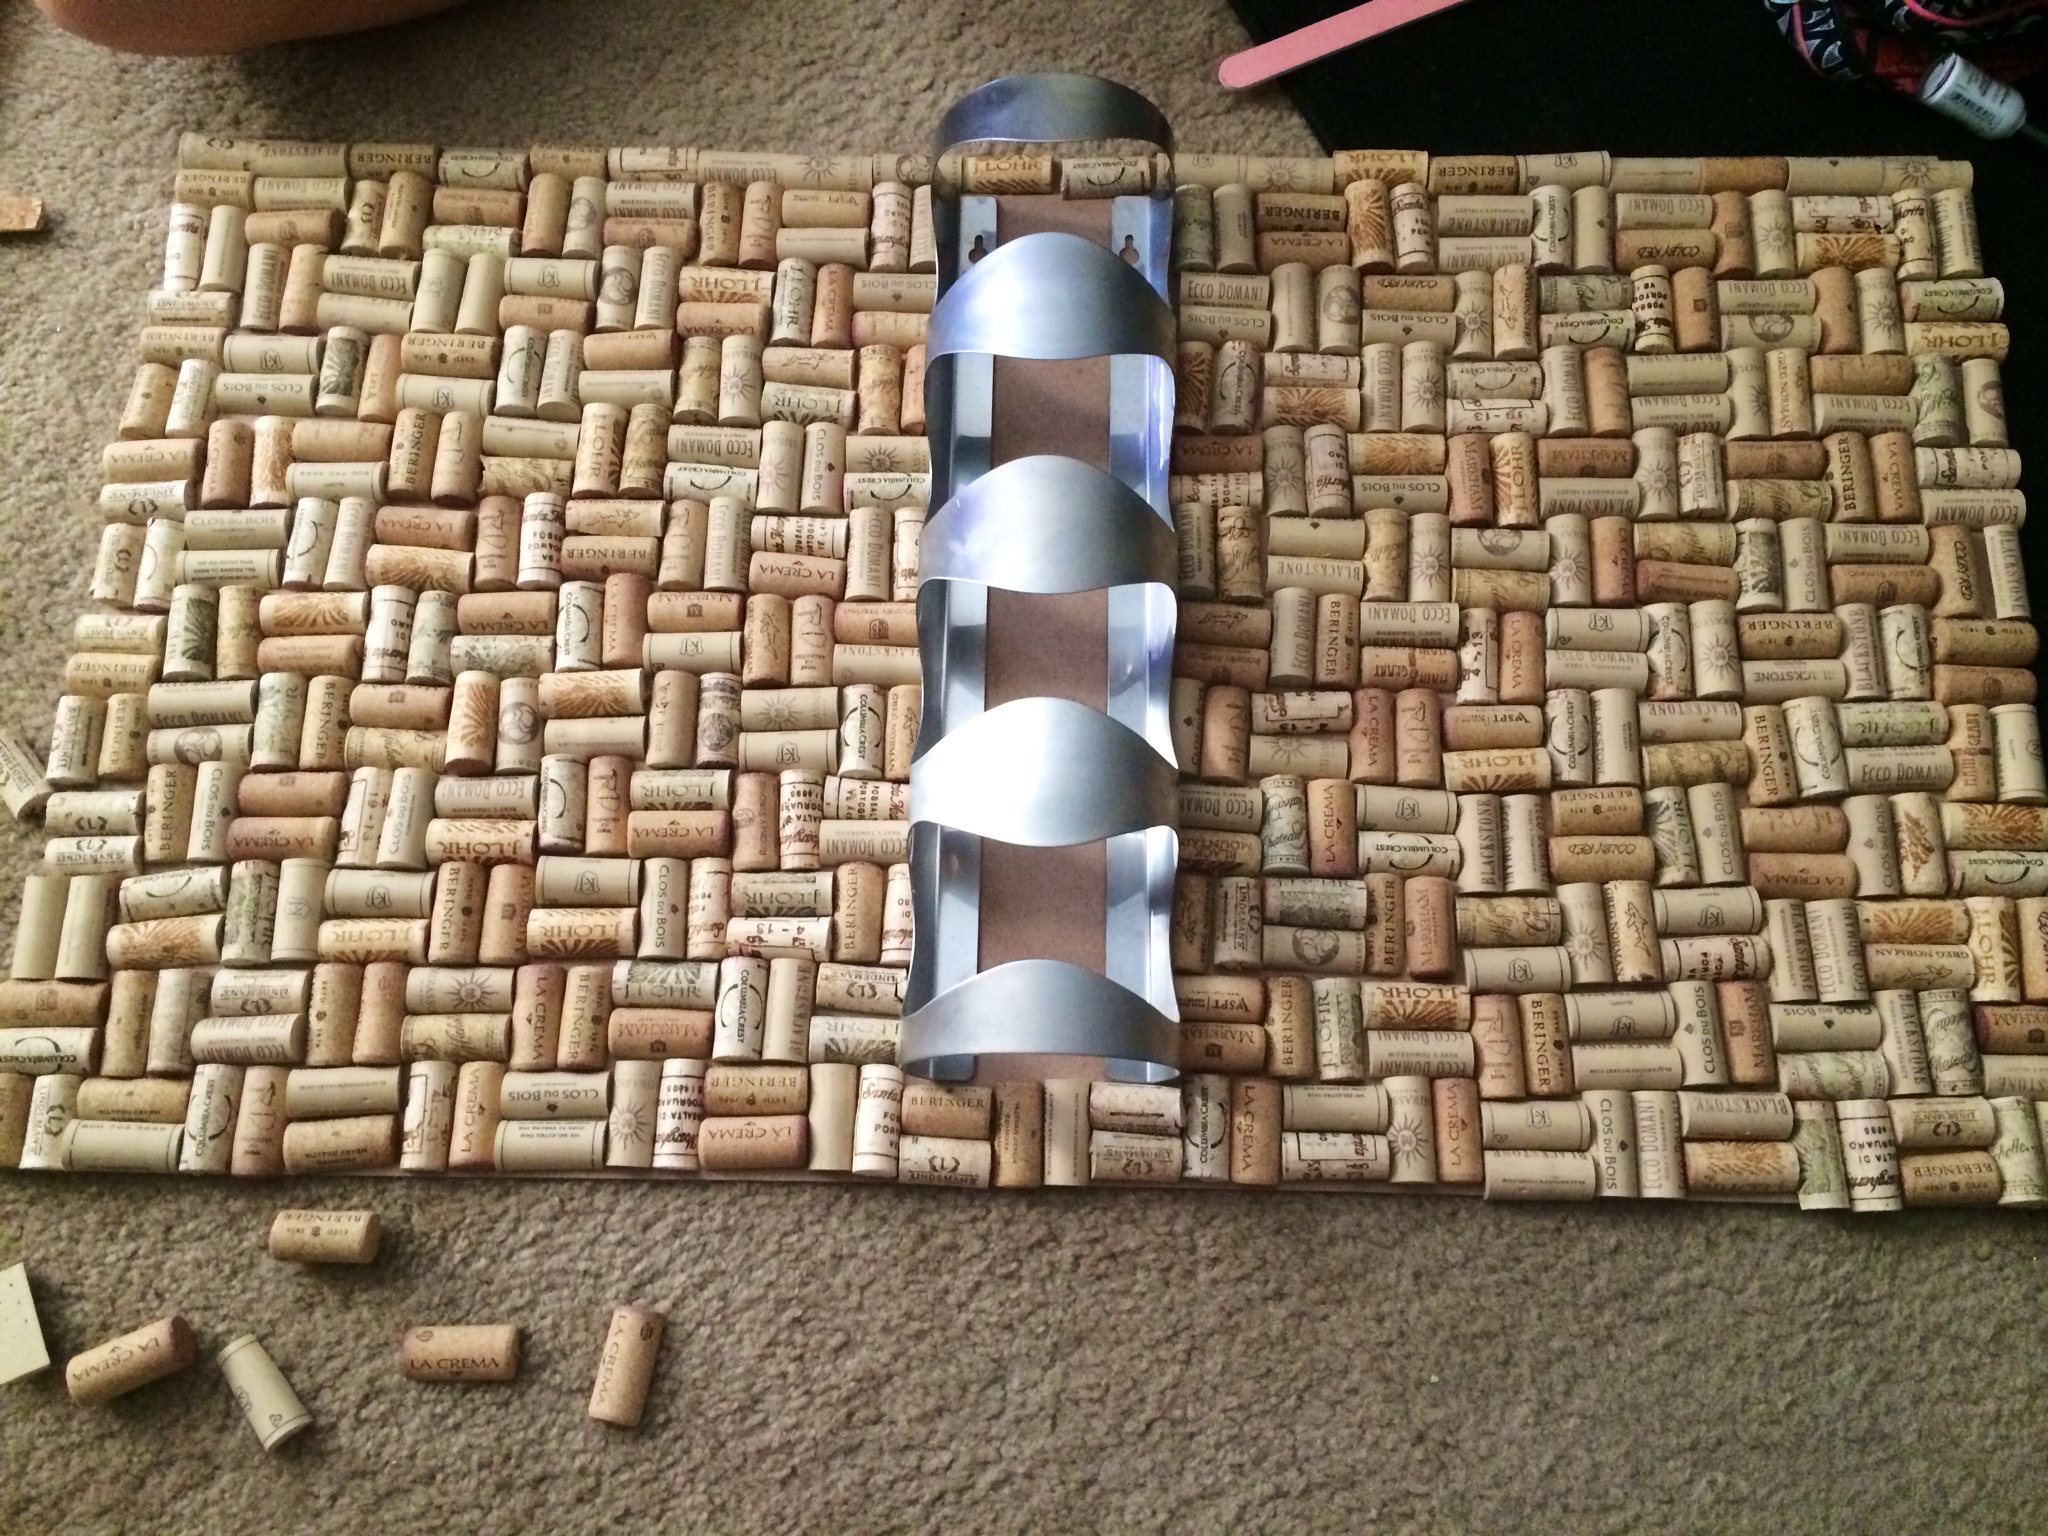
We didn’t want the same brands right next to each other, and chose to do a weave-type pattern with two corks at a time. (As you’ll see below)


Number five
After all your corks are cut, lay them out how you want them and glue them to your board. We used WOOD GLUE and I bought the one that was on sale…of course…remember, Savvy Saver over here!
In case you were wondering…
I couldn’t wait for the glue to dry…which is why you see a blow dryer in the pictures above. I was just trying to help speed up the process. Can you blame a girl?!
We also had an idea in mind that we wanted to add our own WINE HOLDER (we bought this one) in the center of our board, so we drew around that part and put the corks around it, leaving the center part open. *We did use screws to hang the wine holder….don’t worry, we’ll patch it when we move!
We also had an idea in mind that we wanted to add our own wine holder in the center of our board, so we drew around that part and put the corks around it, leaving the center part open. *We did use screws to hang the wine holder….don’t worry, we’ll patch it when we move!

And there you have it!
Super easy, uniquely ours, wine-cork backsplash!

Sara, a seasoned expert in wedding planning and date ideas, brings a wealth of experience to our couples blog. With a background in the television industry and hands-on involvement in a dozen weddings, including working as a wedding assistant on "My Fair Wedding with David Tutera," Sara has an innate understanding of the magic that makes weddings truly special. Growing up with four sisters has given her unique insights into the dating world, making her a go-to source for practical and heartfelt dating advice. Her knowledge and enthusiasm make her the perfect guide for couples seeking to infuse their relationships with creativity and love.
Thanks so much, Kathleen! This was a fun one for us! <3
This is a wonderful project, so unique and it looks good.
Kathleen
Bloggers Pit Stop